Hands on with the iPhone 7 Plus’ crazy new Portrait mode
One of the most talked about features of the iPhone 7 at launch was the new Portrait mode.
It’s a software feature that used the two lenses of the iPhone 7 Plus to create the look and feel of an image shot with portrait settings on a camera with a telephoto lens.
Simply put: a pleasing blur that separates the foreground (person) from the background (other junk). I’m going to get a bit wonky in this piece because I feel the context will be sorely lacking once this feature hits widely — and there are some that are interested.
If you’ve ever had a portrait taken in a park or seen a wedding picture and wondered why they looked so much better than the images from your phone, the answer is really a three-parter:
- A relatively wide aperture is being used, which causes (among other effects) the “field of focus,” or the bit of the picture that is sharp, to be very narrow. This means face in focus, background not in focus.
- It was likely, but not always, shot with a telephoto lens. This enhances that ‘separation’ between subject and background because tele elements in a lens cause telephoto compression, thinning out the apparent field of focus and putting faces into proper proportion. This is why a nose looks the right size in a proper portrait and looks too big with a wide angle lens.
- But mostly, the photographer took the time to learn how to use her equipment, positioned the subject appropriately and used her artistic judgment to provide a proper composition.
Apple can’t yet do anything about the last one for you. That’s your job. But it could tackle the first two, and that’s what it’s done with Portrait mode. Before we get into how it works, let’s break down how it does what it does.
How does it work?
 I’ll just refer back to my iPhone review to set the scene for how Apple is making Portrait mode work:
The depth mapping that this feature uses is a byproduct of there being two cameras on the device. It uses technology from LiNx, a company Apple acquired, to create data the image processor can use to craft a 3D terrain map of its surroundings.
This does not include the full capabilities of the Primesense chip Apple purchased back in 2013 (we have yet to see this stuff fully implemented), but it’s coming.
For now, we’re getting a whole host of other benefits from the two cameras, including “Fusion,” Apple’s method of taking image data from both the wide angle and telephoto lenses and mixing them together to get the best possible image.
We’re also getting Portrait mode, which launches today in developer beta and later this week in public beta.
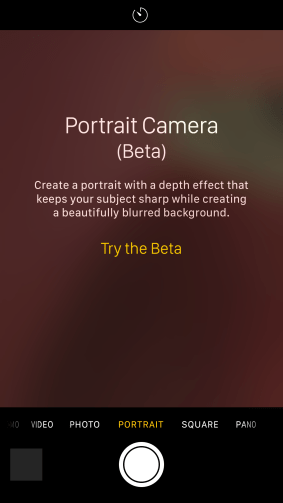
The Portrait mode, which prominently displays a beta notification on first launch, resides on the right side of the standard photo mode in your camera app. There is no zooming, digital or otherwise, in Portrait mode. Instead, the Portrait mode exclusively uses the 56mm lens to shoot the image and the wide angle lens to gather the perspective data that allows it to generate a 9-layer depth map.
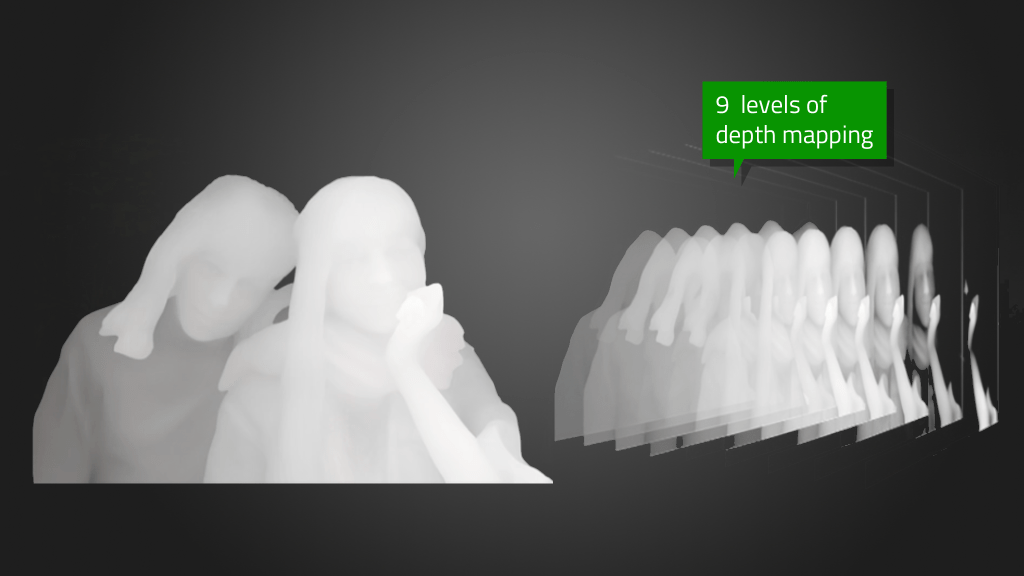
If you want to get a feel for how this works, hold your hand up in front of your face and close one eye. Then open that one and close the other. Do you see how you can see “around” your hand? That’s how Apple’s camera system is working. The wide angle and telephoto “see” slightly different angles on the image, allowing it to separate and ‘slice’ the image into 9 different layers of distance away from the camera’s lens.
Once it has this 9-layer slice, it can then pick and choose which layers are sharp and which get a gaussian (randomish) blur effect applied to them.
Once the telephoto lens detects the subject, using autofocus and other stuff we’ll talk about in a second, the image processor inside the iPhone 7 will then apply blur in greater and greater amounts to the layers that are further away from that subject.
So, for instance, if the camera analyzes the scene and pins your subject at 8 feet away, it will slice the image and apply a blur effect on a progressive gradient scale across the other layers. Things that are very close to your subject may be sharp — included in that variable-width slice of the in-focus area. Once they get further away they get a little blur, then more, then more — until things in the far foreground or far background are blurred to the “maximum” level.
Again, the effect works to separate from both the foreground and background. You can shoot a subject in “the middle” of a scene and it will recognize that and separate accordingly.
There is not precise scale to these distances because they are based on a curve that depends on how close you are to your subject, how much of the frame that subject takes up and how “deep” it is.
In my testing, on average, once objects or scenery are out about 6 feet or more from the subject, you’re at maximum blur. Inside that, you’ll see more or less blur applied to those slices. This all happens seamlessly and you see a real-timepreview of the effect on your screen, which runs at a fixed framerate under 30FPS. My guess is 24fps or so, but enough to give you an accurate preview.
There is very little lag when shooting, around 600-650ms by the claimed numbers. If you see how long a full HDR shot takes to process, then you’re somewhere faster than that and slower than a regular shot.
In order to lock on to your portrait subject and to separate it as cleanly from the background as possible, Apple is using both face detection and (new) body detection systems. This helps it find the subject quickly and to tell the ISP what should be clear and what should not.
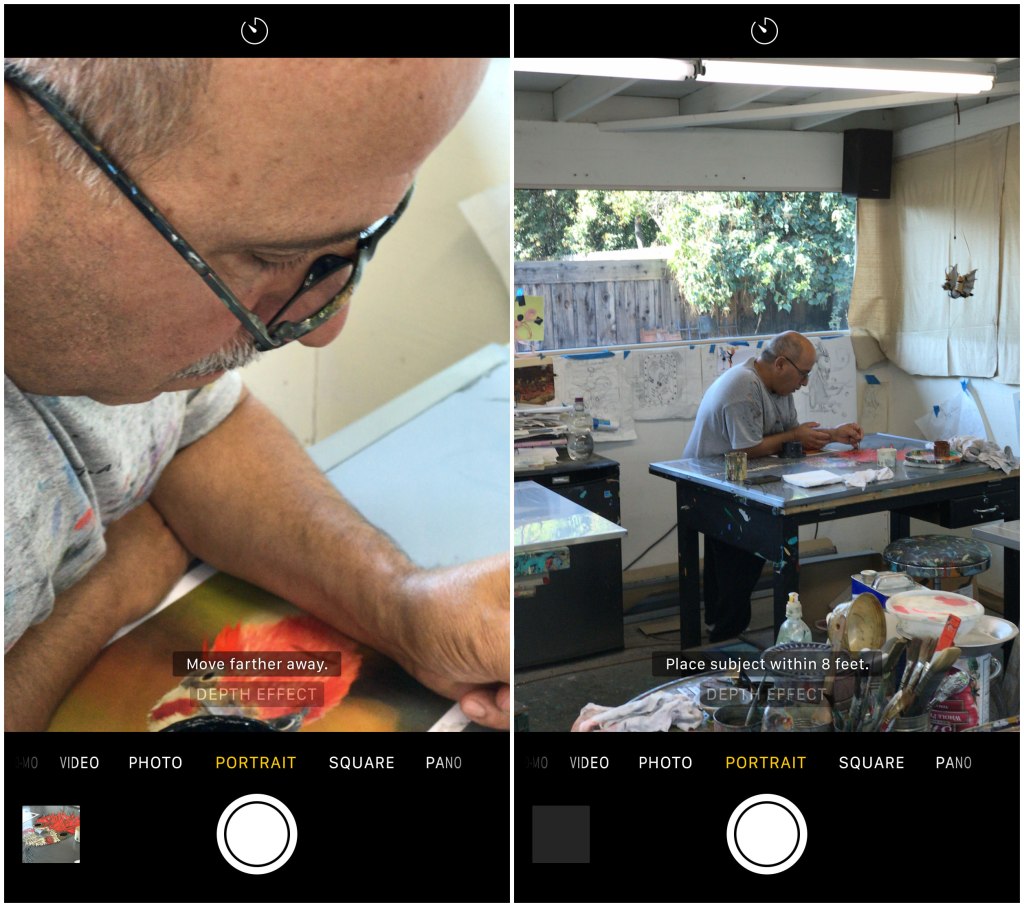
On screen you will see a continuous coaching prompt which tells you whether there is enough light and whether you are too close or too far away for the Depth Effect to kick in. Portrait mode requires a lot of light to work and does not work well in low light or low contrast situations. It also requires that you’re no closer than that 19” minimum focusing distance of the telephoto lens.
The mode sends both the standard image and the portraitized image to your camera roll, with a Depth Effect badge. The images it turns out are standard JPEG images that read as if they came off of the telephoto lens if you examine them. On the iPhone, they are tagged with a ‘Depth Effect’ badge. Otherwise they are identical to other images you shoot on iPhone 7.
So, why the telephoto?
First, this 56mm equivalent lens is called a telephoto in Apple’s marketing, but it it closer to a ‘normal’ lens in photographic terms. Apple calls it telephoto only in comparison to the standard 28mm wide angle lens that sits next to it. So, debate away, but in this case it’s the most tele lens we’ve got to work with.
Apple uses this telephoto lens because the wide angle is better at capturing depth data, has a wider field of view and doesn’t have the telephoto compression effect that the 56mm has. The wide is the ‘primary field of view’ for generating the effect. If you shoot a picture close to a subject with the telephoto (its minimum focusing distance is 19”) where the background is far away you will see this natural blur occur even without portrait mode. So you’re already starting with a better optical stage.
What are the results?
If you’ve skipped here to see how the heck it works, I don’t blame you. The short answer: incredibly, miraculously well in many instances. And pretty rough in others. Apple says this is still in beta and it is. It has trouble with leaves, with chain link fences and patterns and with motion. But it also handles things so well that I never thought possible like fine children’s hair and dog fur, shooting pictures with people facing away and objects that are not people at all.
What does it have major trouble with? Fine lines, wires, chain link, glass, leaves. Anything that merges with the edges of your subject a bunch of times could confuse it. The closer to the subject the harder it is for it to distinguish. Motion, too, is a no. If the subject moves a bit, ok. If it moves too much you get ghosting, as you do in HDR mode — because there is compositing involved.
Let’s look at some examples and I’ll dissect what works, what doesn’t and how the mode is applying the effect in each image. In each case, I’ll include both the standard and Depth Effect image for comparison.
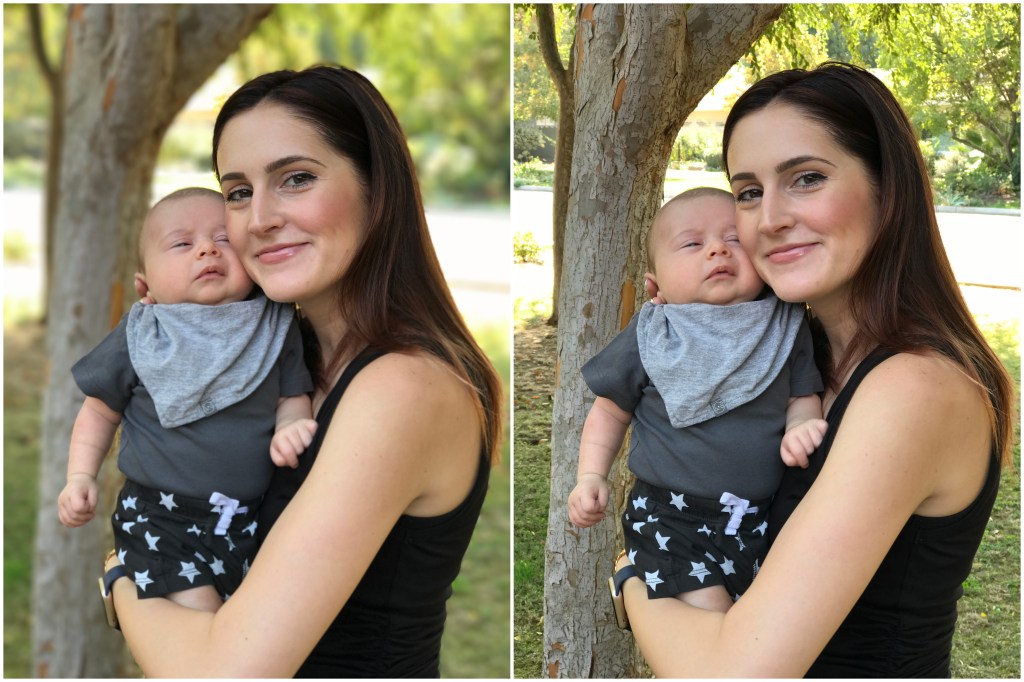
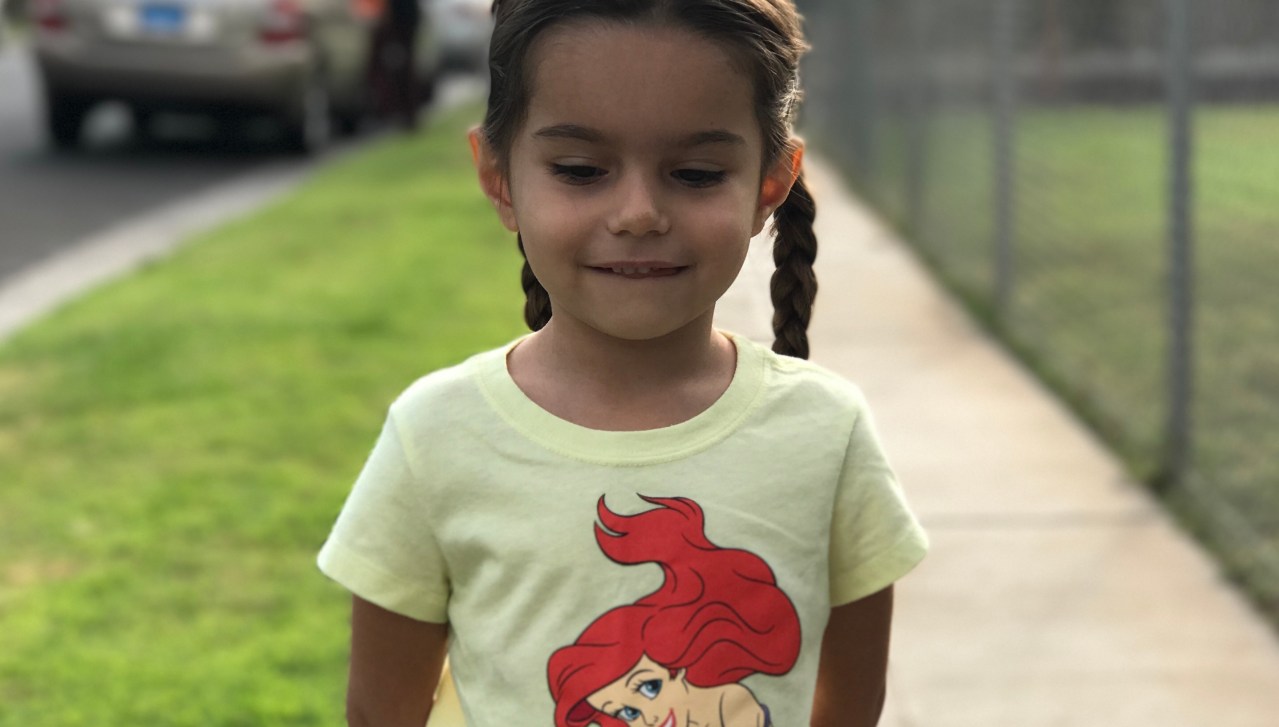
This is a prototypical portrait — a straight up shot with good separation from the background. It’s handled very well. It’s also a prime case for a ‘portrait type’ shot, with a distracting and blasé background that gets made pleasant by the blur effect.
Note how the tree is less blurry than the background, but more blurry than the subject. This is the depth effect gradient at work. It’s not just blurry or sharp — there is a scale at work that makes it feel more natural.
 I’m throwing this one in here to show how little things still trip up the system. Notice the small triangular void in the baby’s arm — it doesn’t get separated. Further software tweaking should help correct things like this that break the system. Data from the beta period will no doubt help.
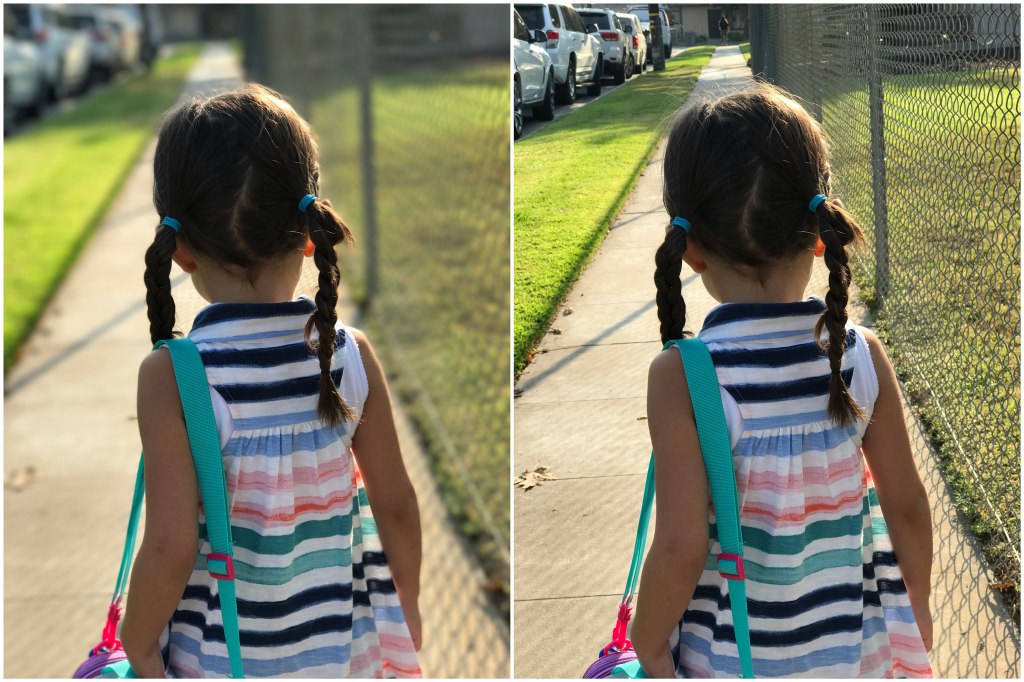 A back shot, showing the Depth Effect without face detection at work. It’s hard to say whether body detection actually fired here but regardless it means that the mode is a lot more flexible than Apple is willing to let on at this point. Extra credit for the chain link being handled well. Fine hair, seen here, is not so bad, though it could be better.
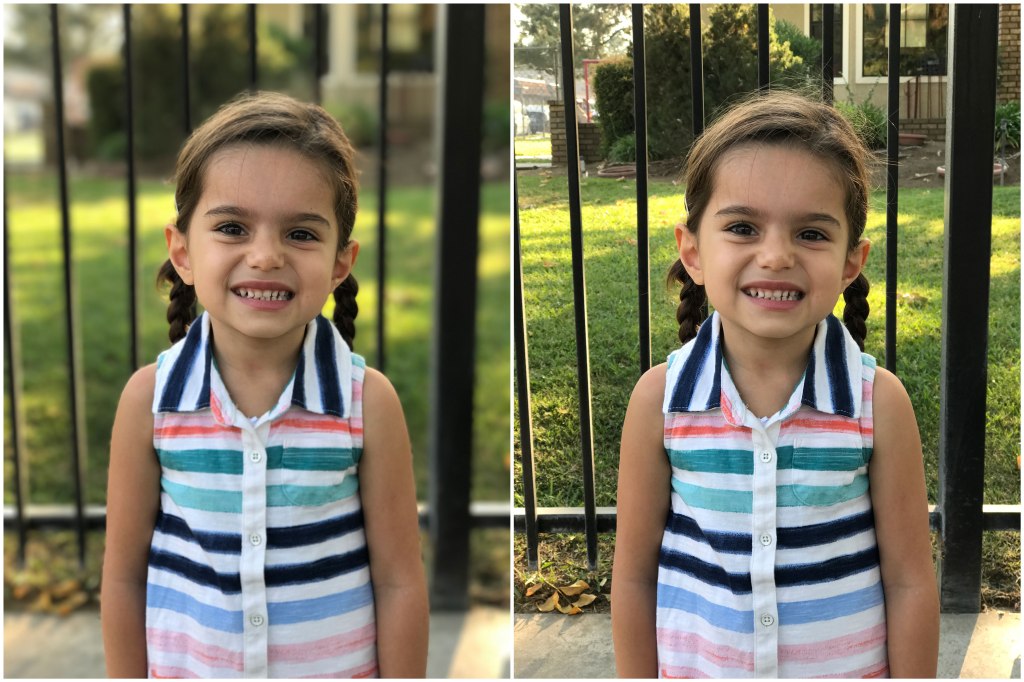 This is a pretty straight up portrait as well, but you see the fence background — bars and lines like this can give the Depth Effect fits. It handled this situation well, but especially around the arms you can see it fall down a bit as it tries to make heads or tails of the separation. Grass, too, is an issue.
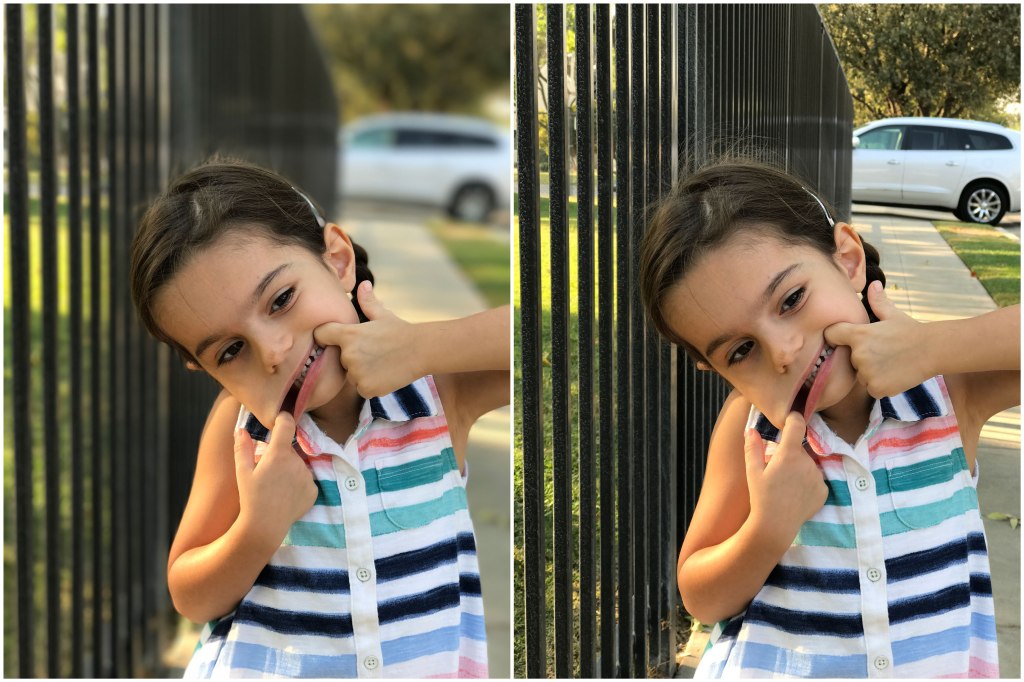 Here’s a shot that shows exactly how the blur effect increases smoothly as you move further away from the lens.
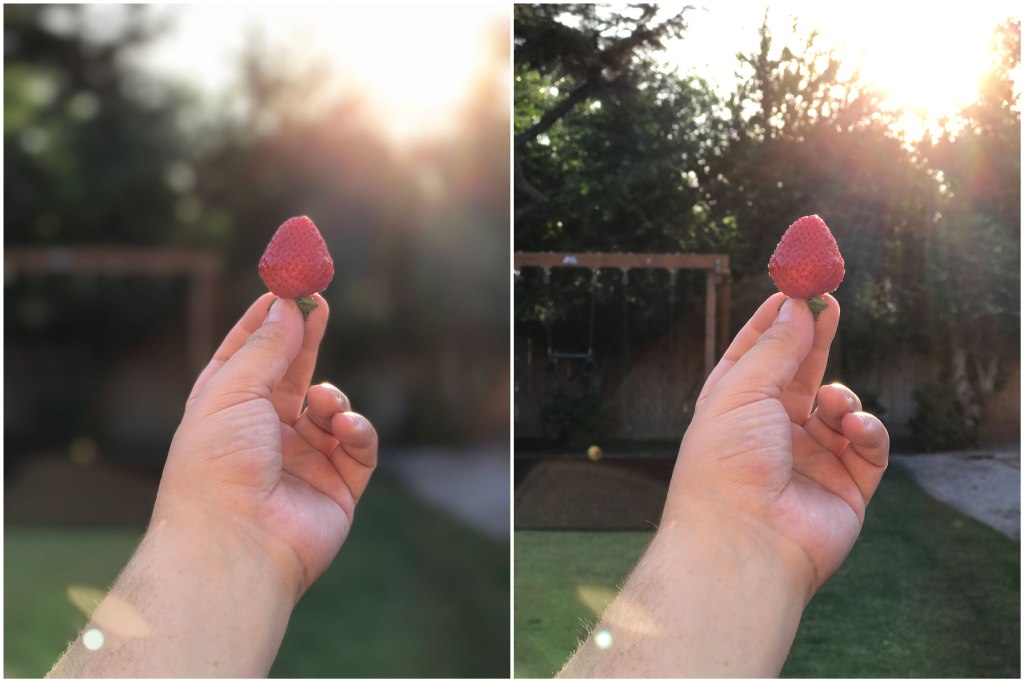 YES. It does work on objects that are not humans. Even though Apple is using image recognition mumbo jumbo on faces, and stresses that this is a portrait mode, it does work on things like strawberries or hands. As long as there is solid contrast (note how dark the background is and how bright the hand is here) you should be in the clear. Note: there is no detection of objects or comparison of image databases to detect or reduce noise going on in Apple’s camera app. For now.
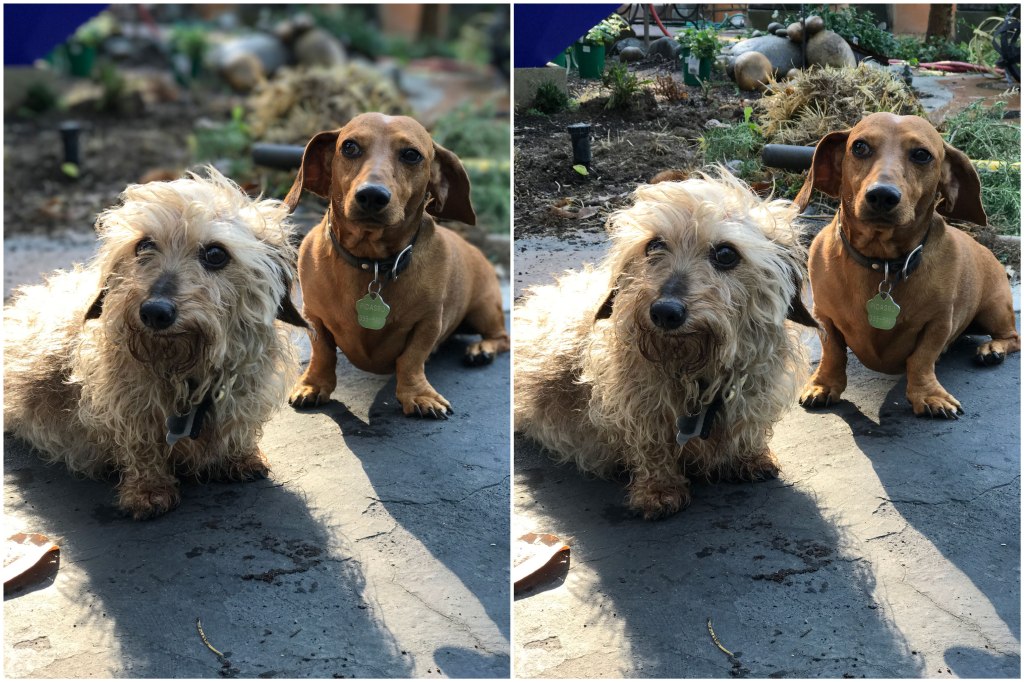 It also works on dogs. But only cute ones. You’ll have to check me on that — it is anecdotal. Notice here that the two pups are ‘grouped’ close to one another. The brain behind the Portrait process is smart enough to include them both in the focused area, blurring the background but not the ‘subjects’. It works the same way on humans, grouping them together even if they are slightly in front or behind using facial recognition. There is a threshold though, and at a certain constraint that person will pop down into the next layer and get blurred.
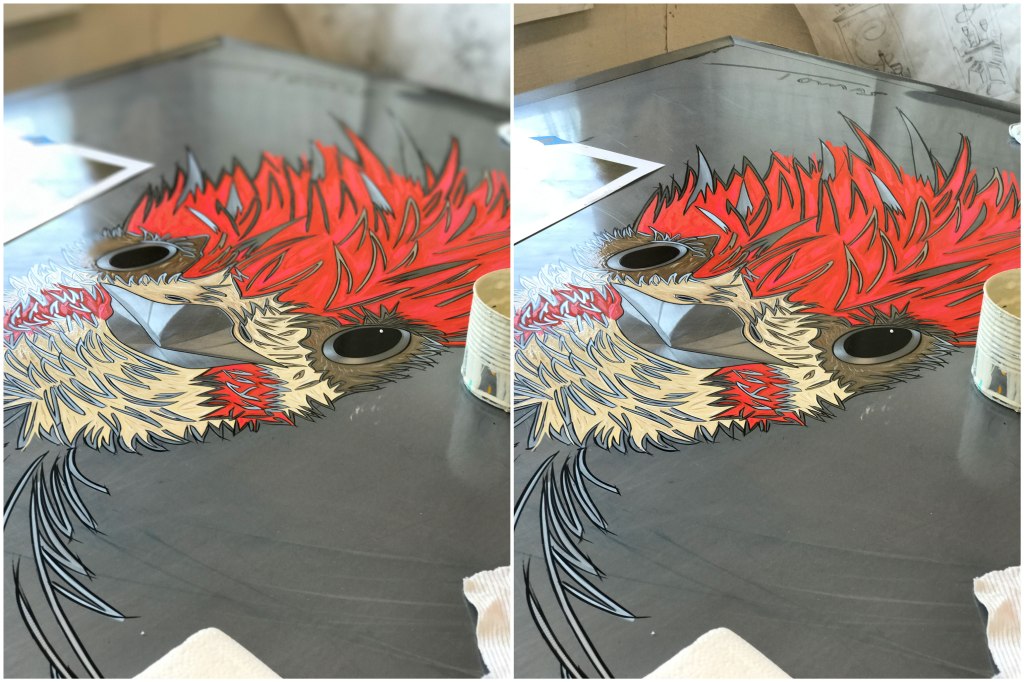 Another object here, but the effect still applies pleasantly from the point of focus. This may seem simple but is deceptively so and actually quite impressive. This makes me excited for what this mode could be in the future, where we can apply depth or lens effects at will as we would with a “real” set of lenses.
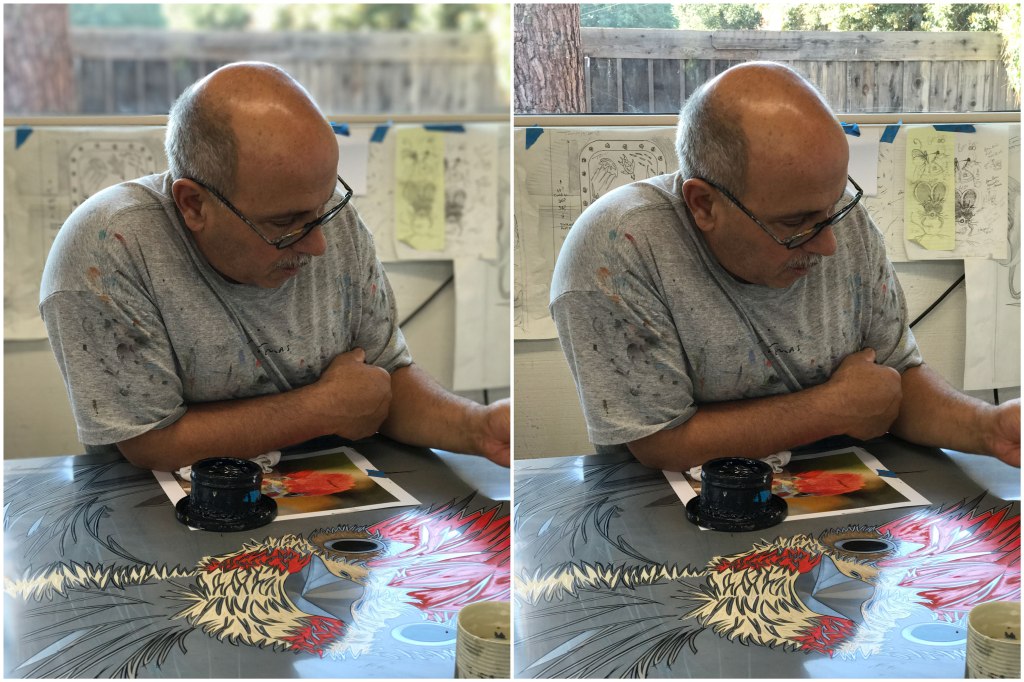
The same goes for this one. Object. No humans in sight. Still works.
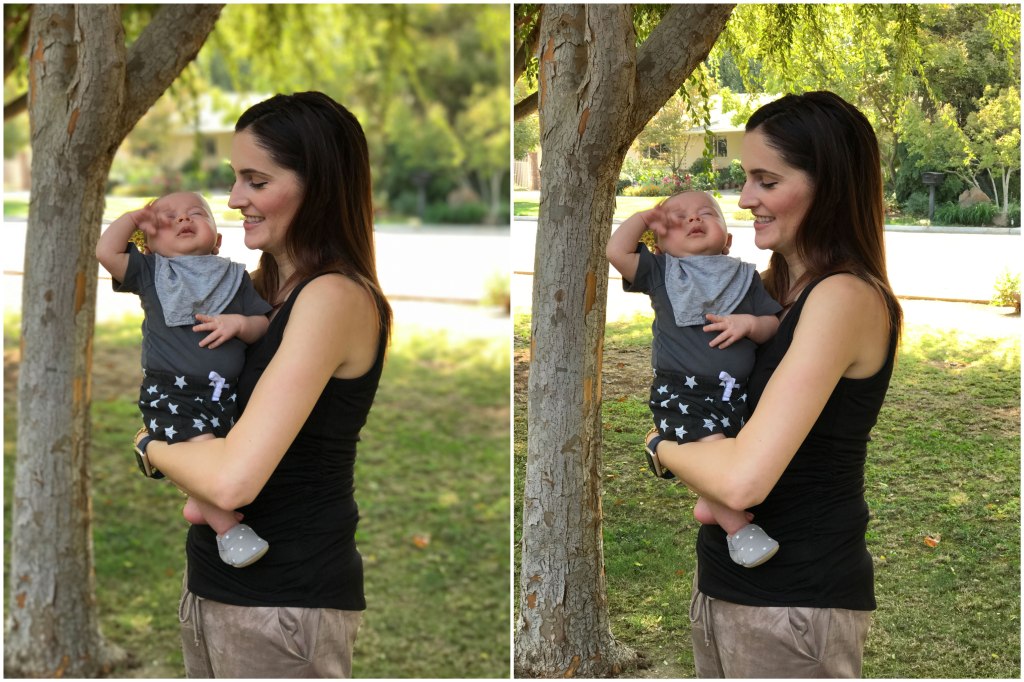
 Another classic use case. A 3/4 shot with body and face in the frame (if not fully). These kinds of shots are where you’re going to get the most impact and the most fun out of this mode.
In the end, it’s clearly an experimental mode. There are glitches and screw-ups here and there. But overall it straight up works — displaying the power of Apple’s fully armed and operational camera and silicon teams. It’s clear that Apple’s camera team is really pushing the silicon in the iPhone 7 to its limits. The effect is stunning when it works, and continued use makes the device run warmer to the touch, especially on the top where Apple’s A10 processor sits.
Once the mode ships fully I’d love to see Apple turn its attention to giving photographers more direct access and control over exactly what gets picked and how blurry we’re making the background. Baby steps though — that probably won’t come for a year or more. Given that it’s this good so far, I’m really interested in seeing just how good it gets.